Rotational bending test

The machine allows estimation of rotational bending moments. Tests can be done in air and in corrosive environments.
Technical Data:
- Manufacturer: Schenk
- Dynamic moment: 0 – 1000 Ncm
- Testing frequency: 100 Hz / 200Hz
- Clamping device: mechanical
- Environment: air, corrosion test in saline solution
Rockwell hardness testing

The testing is done according to C (HRC) with a diamond cone and a load of 98 N (10 kp) respectively 1373 N (140 kp). The testing is done according to DIN EN ISO 65-08.
Technical Data:
- Manufacturer: EMCO-Test
- Type: M4R-075
- Testing method: HRC (according to DIN EN ISO 65-08)
- Load: 1,47 kN
- Resolution: 0,1 HRC
Vickers/Brinell hardness testing

Hardness testing and evaluation of the strength of metallic materials according to the Vickers and Brinell method. The device type M4C 025 G3M allows load up to 2,5 kN. The testing is done according to DIN EN ISO 6507 and DIN EN ISO 6506.
Technical Data:
- Manufacturer: EMCO-Test
- Type: M4C 025 G3M
- Testing method: HV (HV1-HV100)
HB (for example: 2,5/187,5/15) - Load: 2,5 kN
- Resolution: 0,1 HV respectively 0,1 HB
Creep testing machines

Five creep machines MAYES TC 30 & TC 50 with maximum test force of 30 and 50 kN are installed at the Department of Physical Metallurgy and Materials Testing. They work under constant load which is transferred to the sample by weights and a set of levers.
The sample temperature is continuously controlled by a 3 zone furnace. The maximum temperature is - depending on the furnace - 800 °C or 1050 °C. The strain measurement is done by an extensometer leverage and a capacitive displacement transducer, with no limitation on the measuring time.
During the test load, strain and temperature are detected continuously and shown in a diagram. The system allows simultaneous data recording and analysis of the most important parameters.
Currently a round specimen is used for the creep testing with a mounting thread and 6 mm diameter in the relevant measurement zone.
Technical Data:
- Test forces: 30 kN and 50 kN
- Temperature: 800°C / 1050°C
- Atmosphere: Air
Impact testing machine

The impact testing machine RKP450 is built for instrumented testing according to Charpy and IZOD, as well as for tensile impact testing. The machine has a chamber that allows the temperature control of samples from -190 °C to 700 °C. The test starts automatically after the desired temperature is reached.
Technical data:
- Designation: RKP450
- Impact energy: 300 J or 450 J / instrumented
- Testing temperature: -190°C to 700°C
Resonant testing machine

This device is made for tests with high numbers of cycles and high test frequencies up to 250 Hz. The machine is used for estimating finite-life and long-life fatigue strengths in HCF-applications, for crack growth rates, to measure the threshold value and initiations of fatigue cracks.
Technical Data:
- Manufacturer: Rumul Testronic
- Static Fmax: ±150 kN
- Dynamic Fmax: ±75 kN
- Testing frequency: 250 Hz
- Equipment: Crack measurement device
Rockwell Hardness Tester

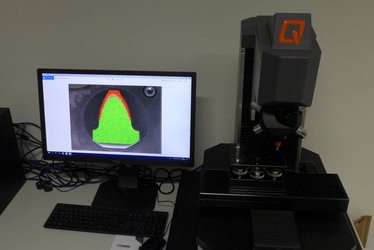
The Rockwell hardness tester Mitotuyo Durotwin can be used for Rockwell hardness testing and for evaluation of the adhesion of thin hard coatings according to VDI guideline 3198. For the latter, a Rockwell-C diamond indenter is pressed into a coated sample with sufficient substrate hardness applying a load of 1.47 kN. The coating delamination around the indent is evaluated according to the six defined VDI adhesion ranges.
Technical data:
- Rockwell-C hardness test (Scales A, B, C, D, F, G)
- Coatings adhesion evaluation according toVDI guideline 3198
- Normal load up to 1,47 kN
- Resolution: 0,5 HR
Servo-hydraulic testing machine (1 and 2)

Hydraulic fatigue testing machines are used to determine S/N-curves (Woehler curves), endurance limits and to test materials in LCF-and HCF-areas. The testing can be done also in corrosive environment.
Technical Data:
- Manufacturer: Schenck
- Static Fmax: ±100 kN
- Dynamic Fmax: ±100 kN
- Testing frequency: 150 Hz
- Equipment: Corrosion testing device, furnace up to 1100°C
Tension-compression testing device (UPM 250 kN)


An universal testing machine with a broad scope for traction, compression and bend tests with load of maximum 250 kN.
Technical Data:
- Manufacturer: universal testing machine KPM 1485
- Fmax: ±250 kN
- Working space: 1570 x 1030 mm
- Testing speed: 0,2 - 2000 mm/min at Fmax = 20 kN
0,02 - 200 mm/min at Fmax = 250 kN - Macro displacement transducer: L0=10-200 mm, L=60mm
- Clamping device: hydraulic system
- Video- and laserextensometer
